BTCClicks.com Banner

Wednesday, 3 January 2018

Photoshop CS Interface

Introduction:

In my old post (MAKING A GOOD DESIGN), I did mention that soon there will be free teaching tutorials to those who want to learn the designs in my post. And to help those who are already Professional Designers to give them more techniques in designing. 
But before starting with our design, we must first have to familiarize yourself with the application; interface, and the uses of the tools as well.


LESSON 1

Exploring The Photoshop Environment

It is very important that you understand how Photoshop interface will help you to perform your tasks better.

The Adobe Photoshop CS 3

Adobe Photoshop CS 3 is an image editing software. It contains a collection of features that allow you to perform basic image editing tasks to advanced imaging tasks such as adding realistic visual effects to your image. Photoshop contains a user-friendly environment with a set of well-defined tools and palettes that are easily accessible and can be customized to suit your specific requirement. It supports a large number of image formats and also supports high-end graphic for different media.

Adobe Photoshop CS 3 Window

The first step towards familiarizing yourself with Photoshop is to explore the software. By identifying the tools and getting familiarized with the environment before actually using it, you can save time and take full advantage of the built-in tools in Photoshop.

The Photoshop window consists of standard interface element, such as the menu bar and the status bar, which are commonly found in all Windows-based applications. It also contains elements such as Tools palette, Options bar, and other palettes that can be used to perform specific tasks and work with images.


The following table describes the interface elements in the Photoshop window

Element
Description
Menu bar

Tools Palette

Options Bar


Document Window

Status Bar


Palettes
Contains the menu to perform a specific functionality

Displays all available tools in different section

Appears below the menu bar and displays additional options for currently selected tools

It holds the currently image file opened in Photoshop

Appears at the bottom of the screen and displays the current magnification of the image. It also has the File Information box, which contains information on the document size, and physical and storage size of the current image.

Contains a group of palettes with a tab for each palette. Most of the palettes contain a menu, which allows you to perform additional tasks.


The Tools Palette

The tools palette displays all the available Photoshop tools organized into different sections


 The following table describes the sections in t the Tools Palette


Section
Description
Selection and Manipulation tools


Pointing and Retouching tools


Type, Path and Shape tools


Utility Tools


Color Control


Mode Control tools


Window Control tools
The selection tools help you make selections in an image and more selected areas within the same image or to another image.

The pointing help you paint with brushes and create gradient files.


The type, path, and shape tools help you to add text to an image; select, create, and edit vector path segments; and create shapes, respectively.

The utility tools allow you to make notes and voice annotations, select background and foreground colors, scroll through an image, and reduce or increase image magnification.

The color control tools display the current foreground and background colors, and enable you to switch between them.

The mode control tools allow you to make selections before editing or painting and to create temporary selection marks.

The window control tools allow you to view the window in different modes – Standard Screen Mode, Maximized Screen Mode, Full Screen Mode With Menu Bar, and Full Screen mode.


Practice

As maybe you are a novice user, you would like to explore the Adobe Photoshop CS 3 environment. You also want to set the window display mode to view images as intended.


How To Do It

  1. Open the Cups and Mugs.psd. file

a)      Choose Star→All Programs→Adobe Photoshop CS 3 to launch the application

b)      In the Adobe Photoshop CS 3 Extended window, choose File→Open

c)      In the Open dialog box, navigate to the Exploring The Interface folder

d)     Select the Cups And Mugs.psd file and click open


  1. See the window display modes

a)      At the top of the Tools palette in the gray area, click the right pointing arrows to view the Change Screen Mode button at the bottom of the Tools palette.
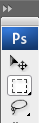


b)      Click the triangle next to the Change Screen Mode button and hold it to display the flyout.


c)      From the flyout, select Full Screen Mode With Menu Bar to view the image at the centers of the screen.

d)     Expand the Change Screen Mode to hide the window controls and the menu bar.

e)      Press Tab on your keyboard to hide the palettes and view only the image

f)       Press Tab again to return to view the palettes.

g)      Expand the Change Screen Mode flyout

h)      From the flyout, select Standard Screen Mode to view the image along with the window control and the main manu.


Now get ready for our new post............................

Thursday, 12 March 2015

Photographers Buseness Card (Free Download)

To use our FREE templates, you must be a user friendly with Adobe Photoshop CS3 or higher or Adobe Photoshop application. And to use our vector FREE design templates, you have to be familiar with Adobe Illustrator CS3 or higher.

 To download this template design, please click here to download

Tuesday, 10 March 2015

Free Church Flyer download

To use our FREE templates, you must be a user friendly with Adobe Photoshop CS3 or higher or Adobe Photoshop application. And to use our vector FREE design templates, you have to be familiar with Adobe Illustrator CS3 or higher.

Tuesday, 22 May 2012

How to Select Image Areas in Phoshop CS3


How to Select Image Areas

Course of Action: Create a New Document
To create a New document;
1. Choose File and click New
2. In the New dialog box, specify the desired settings
3. The click OK.

Course of Action: Make a Selection
To make a selection using Rectangular Marquee tool
1. Open the document where you want to create a selection.
2. On the Tools palette, select the Rectangular Marquee tool.
3. Position the cross hair cursor at the location where you would like to short the selection and drag to make a rectangular marquee selection.
4. If necessary, continue hold down the mouse button and the spacebar to move a selection as you draw it.

Make a Selection using Elliptical Marquee tool
1. Click and hold the Rectangular Marquee tool without releasing the mouse click and, from the flyout, select the Elliptical Marquee tool.
2. Position the cross hair cursor at the location where you would like to start the selection and drag to make an elliptical marquee selection
3. If necessary, you can hold down the mouse button and the spacebar to move a selection as you draw it.


How to make a freehand selection using Lasso tool
1. Select a lasso tool
2.  a) Click at the outer edge of the object or on the portion of the image to be selected and drag to make a freehand selection; or
     b) Hold the Alt key and click at the outer edges of the object to create a selection.
3. Release the mouse button to end the selection at the same location you began.


Make a selection based on a color using Quick Selection tool
1. Click and hold the Magic Wand tool and, from the flyout, select the Quick Selection tool.
2. Position the cross hair cursor at the location where you would like to start the selection and drag to make selection. You can also click it once if the background is a solid color, like (black, white, red etc).
3. If necessary, choose Select and click Deselect, or choose keyboard shortcut Ctrl+D to remove the selection.


Hint:
Deselection in Photoshop
Whenever you want to remove a selection, you should always choose the Deselect command in the Select menu. Unlike with other graphic application, you should not simply click in a blank space to deselect when using Photoshop. Since the entire image is made up of individual pixels, there is no empty or transparent space in a Photoshop image unless you add layers. White space is a single-layer image is simply a large area of white pixels.


Confine Selections
Sometimes it is vital that the selection area you create with the Rectangular or Elliptical Marquee tools be a perfect square or circle. You can confine the marquee tools to create squares or circles by holding down Shift while using the marquee tools.


Inverse Selection
When you make selection using the selection tools, you can inverse the selection if necessary. To inverse, click Select in the menu bar and click Inverse.  For keyboard shortcut key; press and hold Shift+Ctrl+I.


Tips:
Perhaps you are not familiar with the Photoshop tools, but you want to try your hands to learn Photoshop by yourself. To know the tools and their names, point the mouse pointer on the tool in the Tools Palette, and it will display the name of that tool.


Saturday, 19 May 2012

Photoshop CS3 Selection Tools


Photoshop CS3 Selection Tools

The Marque tools
The Marque tools allow you to select geometric areas in images. The following table describes the different types of marquee tools.

Tools
Description
Rectangular Marque tool
Used to select geometric areas such as boxes


Elliptical Marquee tool
Used to select geometric areas such as circles. You can move and transform the selection marquee.

Single Row Marquee tool
Used to create a border as pixel-wide row

Single Column Marquee tool
Used to create a border as a pixel-wide column.


Floating Selection and Fixed Selection
A floating selection refers to a select group of pixels that float above the background image when moved from their original spot. The background will remain unaffected when you move the same selection to another spot. However, if you deselect the pixel group, it will become a fixed selection and get fixed at the current position.

Cropping a Row or Column of Pixels
You need to use the Single Row Marquee tools to select extra row or column. This is useful when you have to delete an extra row or column of pixels from an image that includes just a bit of the background.


The Lasso Tools
The Lasso tools are used to select complex areas in an image. The following table describes the different lasso tools.

Tool
Description
Lasso  tool
Used to make free form segments of a border.

Polygonal Lasso tool
Used to make straight-edged segments of a section border. You can also use it to select areas that are made up of straight lines.

Magnetic Lasso tool
Used to select portions of an image with complex edges that set against a high-contrast background. It allows you to accurately select image areas that contain many colors


The Magnetic Lasso Tool Options Bar
The Magnetic Lasso tool options bar contains several additional options that affect how the Magnetic Lasso tool functions.

Option
Description
Feather text box
Allows you to specify how soft the resulting edges will be when a selection is completed.

Anti-alias check box
Allows you to specify the detection width in pixels.

Contrast text box
Allow you to specify a value that enables the Magic Lasso tool to detect the edges in an image.

Frequency text box
Allows you to specify how often Photoshop places points on the path.


The Quick Selection Tool
The Quick Selection tool used tool is used to make a accurate selection of complex shapes using an adjustable brush. When you drag the brush, the selected areas expands along define edges of the image. You can also hold on the shift key and click around the selection to select.


The Magic Wang Tool
The Magic Wand is used for selecting pixels of an image that are similar in color or brightness with a single click. I mean, when the background has a solid color. You can use this tool to select contiguous pixels by using the contiguous check box on the options bar.


The Tolerance Option
The Tolerance option allows you to specify the Magic Wand tool’s sensitivity to color differences. In Photoshop, each pixel within an image is coded with color and brightness information. While using Magic Wand tool, you can specify the range or tolerance of pixels selected to ensure that only pixels similar in color to the pixel you clicked with the Magic Wand tool will select; the lower the tolerance, the smaller the area that the tool will select.   


The Anti-Aliasing Feature
Anti-aliasing is a feature that allows you to smoothen edges by placing light pixels around a selected object. It is often used on text to create the illusion of smoother curves.